Metuchen High School: GIMP

Metuchen High School: GIMP |
|
10. Dodge and Burn
3 points
This is an exercise intended to show you how dodging and burning work. The exercise you are asked to do is discussed below.
Dodging and burning are techniques that can be used to lighten or darken an area of an image. In the olden days, when one printed black-and-white photos in a darkroom with an enlarger, dodging and burning were done manually. Dodging was done by holding a light-blocking shape of plastic over the photographic paper as it was exposed to light from the enlarger, lightening the affected areas. Burning was done after the paper was exposed to light from the enlarger. The enlarger was activated again and, by holding a piece of cardboard with a hole in it over the paper, light was allowed to reach specific areas of the print, darkening them. Now it's all done with software.
Open the image you want to work on.
Choose the Dodge/Burn tool  from the Toolbox. Double-click the icon to open the Tool Options panel. In Tool Options, Type (near the bottom of the panel) allows you to choose either Dodge or Burn. Either Exposure or Opacity allows you to adjust the 'strength' of the tool.
With Brush, you can change the type of brush that you'll use to paint. Size adjusts the size of the brush.
from the Toolbox. Double-click the icon to open the Tool Options panel. In Tool Options, Type (near the bottom of the panel) allows you to choose either Dodge or Burn. Either Exposure or Opacity allows you to adjust the 'strength' of the tool.
With Brush, you can change the type of brush that you'll use to paint. Size adjusts the size of the brush.
There may be a degree of trial and error as you work with the Dodge/Burn tool. You may find, for example, that you've darkened an area more than you wanted to. So undo the action (CTRL-Z), adjust the tool, and try again.
Example
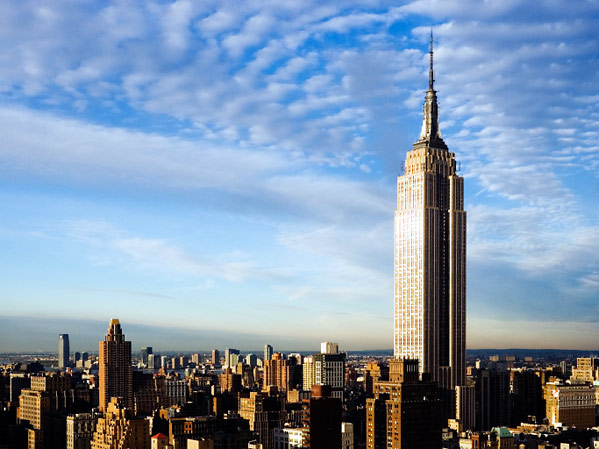
I start with this image of the Empire State Building:
I use Dodge to lighten the darker side of the building. Here is the result:
I then use Burn to darken the area of the building where the bright sun is hitting. Here is the result:

Select a photo to work on that you think would benefit from some dodge, and a photo that would benefit from some burn. (It is also OK to do both operations on the same photo.)
Apply the technique listed above to dodge and burn.
Dodge/Burn Tool in the GIMP Tutorial
This video discusses a more complex approach to dodge and burn: www.youtube.com/watch?v=YT_tTDaYEOU (has sound; video starts at about 0:20)